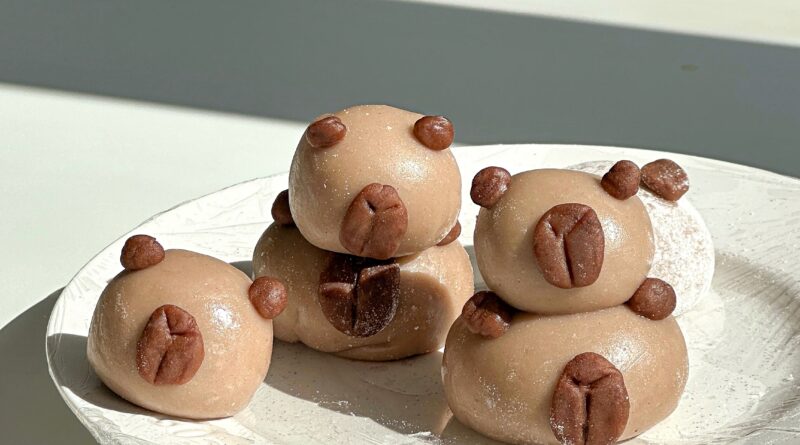
Mould-Free Capybara Snow Skin Mooncake
Creating mooncakes can seem daunting, especially for beginners, but this Mould-Free Capybara Snow Skin Mooncake recipe is designed to be both simple and rewarding. With a foolproof snow skin that stays chewy even after a few days in the freezer, these chocolate-flavored treats are filled with a rich coffee custard cream cheese filling. No need for special moulds—just your creativity and a few key tools will get you started. Perfect for those new to mooncake making, these delightful capybara-shaped mooncakes will impress without the stress.
What is Snow Skin Mooncake?
Snow skin mooncakes are a modern twist on traditional baked mooncakes. Originating from Hong Kong, they have a soft, mochi-like outer layer made from glutinous rice flour, often flavored and colored with various ingredients. Unlike traditional mooncakes, snow skin mooncakes are not baked but refrigerated, making them a refreshing treat, especially during the Mid-Autumn Festival.
Key Tools for Mooncake Making
Kitchen Scale
A kitchen scale is essential for accurately measuring ingredients, ensuring the proper balance of flavors and textures in your mooncakes. Measuring spoons will also be used in this process.
Disposable Gloves
Disposable Gloves are important when working with snow skin mooncakes. These help keep your hands clean and prevent the dough from sticking. They also come in handy when assembling mooncakes to ensure that the fillings and dough stay intact without any unwanted residue from your hands.
Key Ingredients for Snow Skin Mooncake
Snow Skin
- Glutinous Rice Flour: Forms the base of the snow skin, giving it its characteristic chewiness.
- Rice Flour: Adds structure to the dough.
- Corn Starch: Helps to soften the texture.
- Sugar: Sweetens the snow skin.
- Whipping Cream: Adds richness to the dough.
- Vegetable Oil: Keeps the snow skin soft and pliable.
- Milk: Moistens the dough for a smooth texture.
- Cocoa Powder: For the natural brown color.
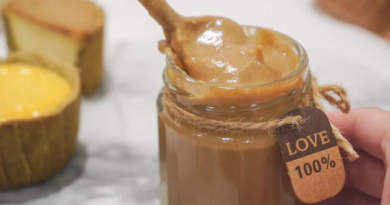
Coffee Cream Cheese Custard Filling
- Cream Cheese: Provides a creamy, tangy base.
- Egg: Binds the custard together.
- Sugar: Sweetens the custard.
- All-Purpose Flour: Thickens the filling.
- Milk: Adds creaminess to the custard, can be substituted with other types of milk.
- Unsalted Butter: Enhances the richness of the filling.
- Instant Coffee Powder: Adds a bold coffee flavor to the custard.
The Process
1. Prepare the Snow Skin Dough
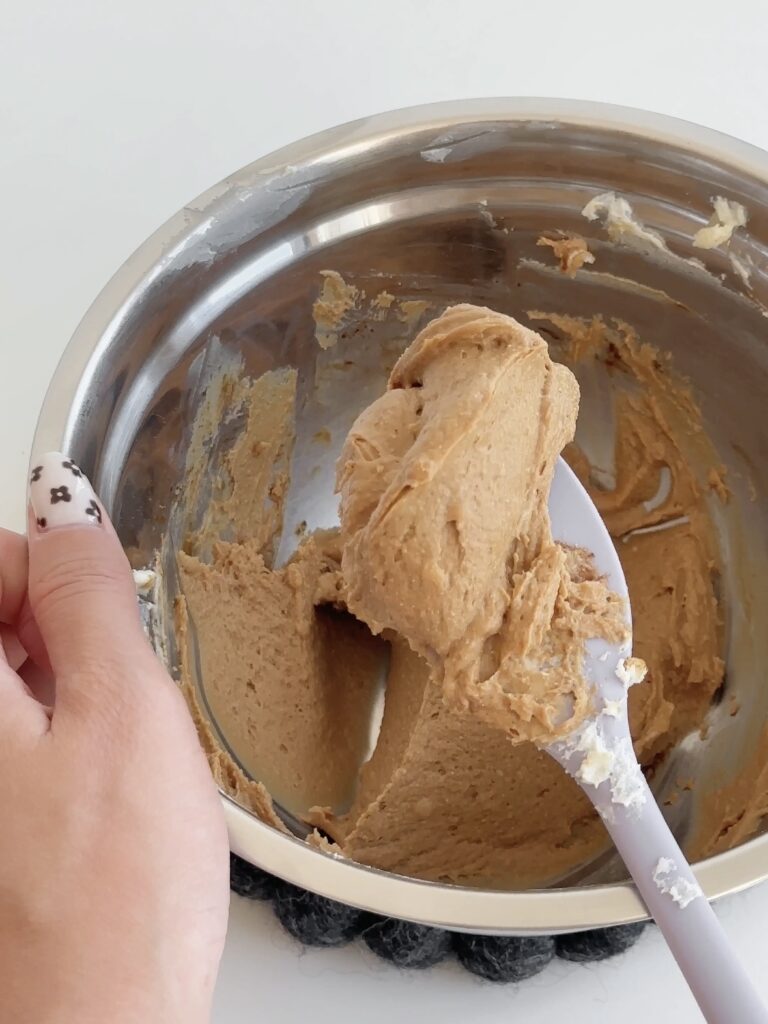
The first step in this mooncake recipe is to prepare the snow skin dough. Once the ingredients are mixed, let the dough rest in the fridge for an hour to firm up. Alternatively, you can make the dough the night before, which will help streamline the assembly process the next day.
- In a mixing bowl, sift rice flour, glutinous rice flour, cocoa powder, and corn starch.
- Add sugar and mix well.
- Add whipping cream, milk, and vegetable oil. Mix thoroughly until no clumps remain.
- Cover the bowl with plastic wrap, poking a few holes in it. This is done to prevent the moisture from steaming from falling into the dough.
- Steam the mixture for 10-15 minutes over medium-high heat, or until no liquid is visible.
- After the mixture is cooked, use a fork to mash it. Set it aside to cool down. To expedite the cooling process, you can place it in the freezer for a maximum of 5 minutes.
- Once cooled, knead the snow skin dough until it becomes smooth. This should take less than 5 minutes.
- Cover the dough with plastic wrap. Refrigerate for at least one hour to let the dough to firm up.
2. Prepare the Coffee Cream Cheese Custard Filling
You can find the full recipe for the cream cheese custard filling in my previous blog post. To make it coffee-flavored, just mix in 2 tablespoons of instant coffee powder.
3. Assemble the Mooncake
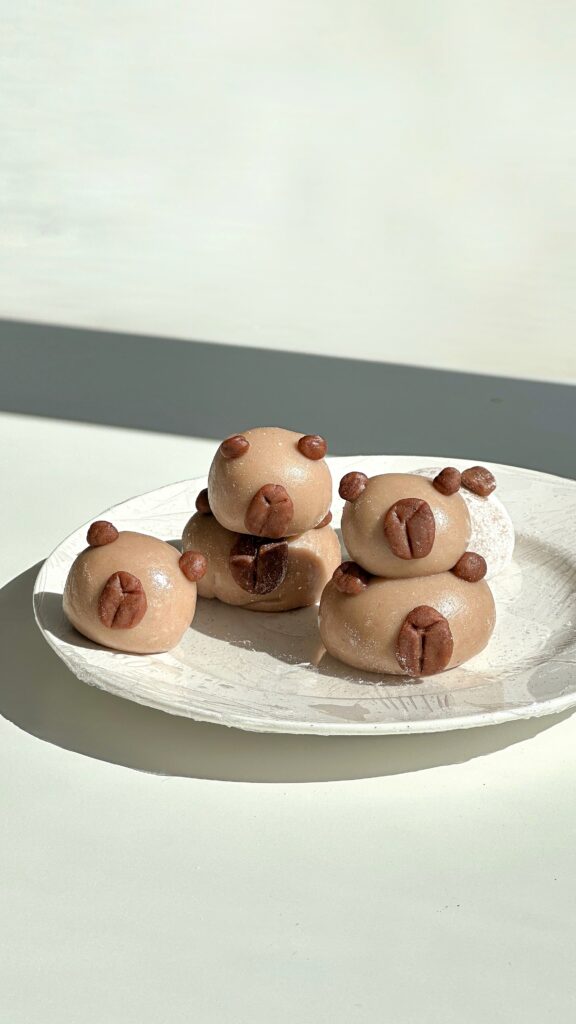
To create bite-sized snow skin mooncakes, I used two size variations: 10g filling with 10g snow skin and 18g filling with 18g snow skin. A perfectly balanced mooncake features a delicate outer shell paired with a generous amount of filling.
Snow skin dough, much like mochi, can easily stick to your hands, so it’s best to wear disposable gloves while handling it.
- Roll the dough into a ball.
- Gently flatten it into a disk, thinning the edges to increase the surface area.
- Place the filling in the center.
- Seal the top by folding the edges upward around the filling.
- Roll the mooncake between your gloved palms to form a smooth ball. This step ensures the dough adheres fully to the filling, preventing any gaps.
4. Shaping the Mooncake
When shaping these mooncakes, do not dust the dough with cooked glutinous rice flour, as it can cover the capybara face and design.
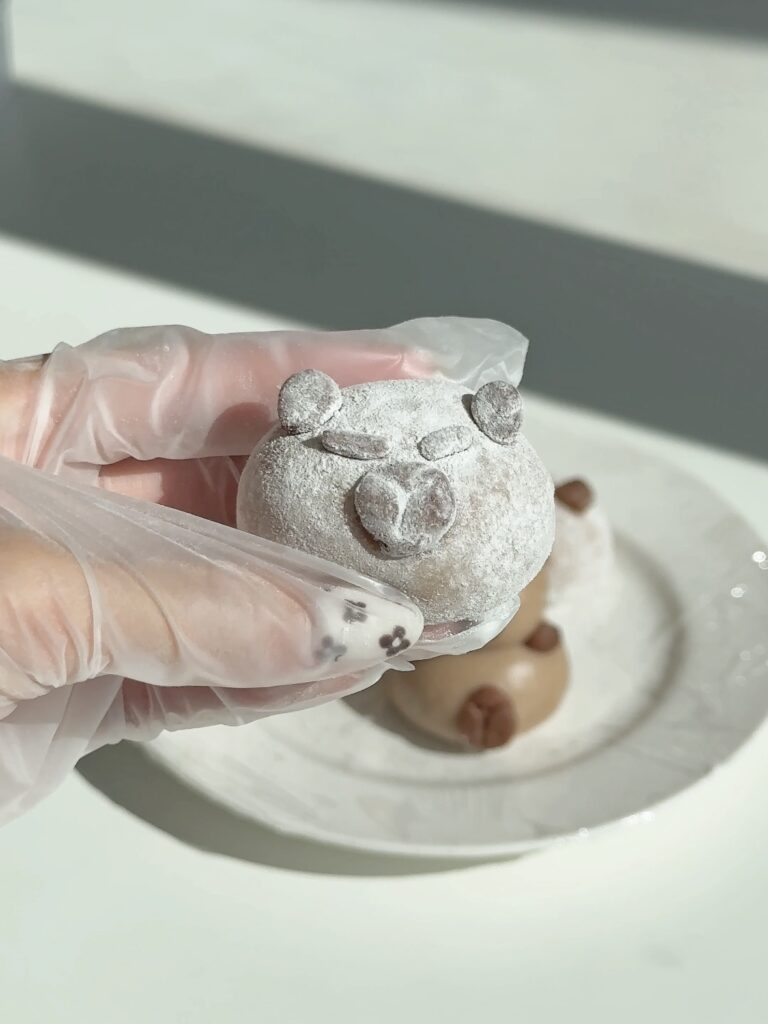
If you plan to stack the mooncakes like I did, lightly dust the bottom of the smaller mooncakes with a bit of cooked glutinous rice flour. This will help prevent them from sticking to the tops of the other mooncakes without compromising the design.
5. Storing & Serving the Snow Skin Mooncake
Snow skin mooncakes should be kept in an airtight container in the freezer. They are at their best when consumed within a few days, with a maximum limit of 1 week. If stored for too long, the mochi will dry out and develop cracks.
For an optimal taste experience, allow the mooncake to sit at room temperature for 10 to 20 minutes before savoring.
Tips on Shaping the Perfect Snow Skin Mooncake
Snow Skin must be Cooled
Before assembling the mooncakes, make sure the snow skin is cool. If it’s still warm, it will be too sticky and soft to work with. Wrap the snow skin dough in plastic wrap and let it chill in the fridge for at least an hour. This helps the dough firm up, making it stretchier and easier to handle.
Snow Skin Thickness
For a well-balanced texture, keep the center of the snow skin dough thicker and the edges thinner. Start by rolling the dough into a disk, then gently roll from the center outward to create even thickness across the surface.
Other Mooncake Filling Ideas
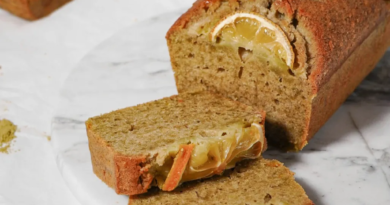
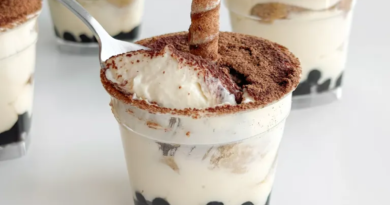
You can be creative with the fillings. While mung bean paste is a common choice, it takes time and patience to make. I prefer going for simple and delicious fillings, with minimal preparation. Here are some of the mooncakes I made over the past years:
- Snow Skin Mooncakes with Shredded Coconut & Purple Yam Lava
- Taro Mochi Swirl Mooncakes
- Tiramisu Snow Skin Mooncakes
Alternatively, you can revisit the blog posts from the Mooncake Series:
- Part 1: 4 Easy Mooncake Filling Ideas to try for Mid-Autumn Festival
- Part 2: No-Bake Black & Pink Oreo Cream Cheese Snow Skin Mooncakes
- Part 3: Genmaicah Lava Kinako Snow Skin Mooncakes
- Part 4: Coconut Latte Snow Skin Mooncakes
- Part 5: Fruit Jelly Mooncakes
- Part 6: Black Sesame Lava Cookie Crust Mooncakes
- Part 7: Air Fry Matcha Mochi Mooncakes with Cookie Crust
Mould-Free Capybara Snow Skin Mooncake
Equipment
- Plastic wrap
Ingredients
Snow Skin
- 44 g glutinous rice flour
- 34 g rice flour
- 20 g corn starch
- ½ tsp cocoa powder
- 20 g sugar
- 34 g whipping cream or coconut milk
- 20 g vegetable oil
- 134 g milk
Coffee Cream Cheese Custard Filling
- 120 g cream cheese softened
- 1 large egg approx. 50g
- 25 g sugar
- 20 g all-purpose flour
- 100 g milk any kind
- 10 g unsalted butter
- 2 tbsp instant coffee powder
Instructions
To prepare Coffee Cream Cheese Custard filling:
- Check out the full recipe on my previous blog post.
To prepare snow skin:
- In a mixing bowl, sift rice flour, glutinous rice flour, cocoa powder, and corn starch. Add sugar and mix well.
- Add whipping cream and vegetable oil. Mix thoroughly until no clumps remain.
- Cover the bowl with plastic wrap, poking a few holes in it. Steam the mixture for 10-15 minutes over medium-high heat, or until no liquid is visible.
- After the mixture is cooked, use a fork to mash it. Set it aside to cool down. To expedite the cooling process, you can place it in the freezer for a maximum of 5 minutes.
- Once cooled, knead the snow skin dough until it becomes smooth. This should take less than 5 minutes.
- Take about 15g of dough and mix in ¼ teaspoon of cocoa powder. Knead until the color is evenly incorporated. This darker dough will be used for shaping the capybara's ears and mouth.
- Wrap the snow skins with plastic wrap and place them in the fridge for at least 1 hour.
To assemble snow skin mooncakes:
- Divide the snow skin dough into two sizes: 10-gram and 18-gram.
- Divide the coffee cream cheese custard filling into 10-gram and 18-gram portions.
- Place the coffee cream cheese dough on a plate, cover it with plastic wrap, and chill in the refrigerator for at least 30 minutes. If your room is cool, you can skip this step.
- Gently flatten it into a disk, thinning the edges to increase the surface area. Place the filling in the center.
- Wrap the filling with the snow skin dough, ensuring tight edges.
- Roll the mooncake between your gloved palms to form a smooth ball.
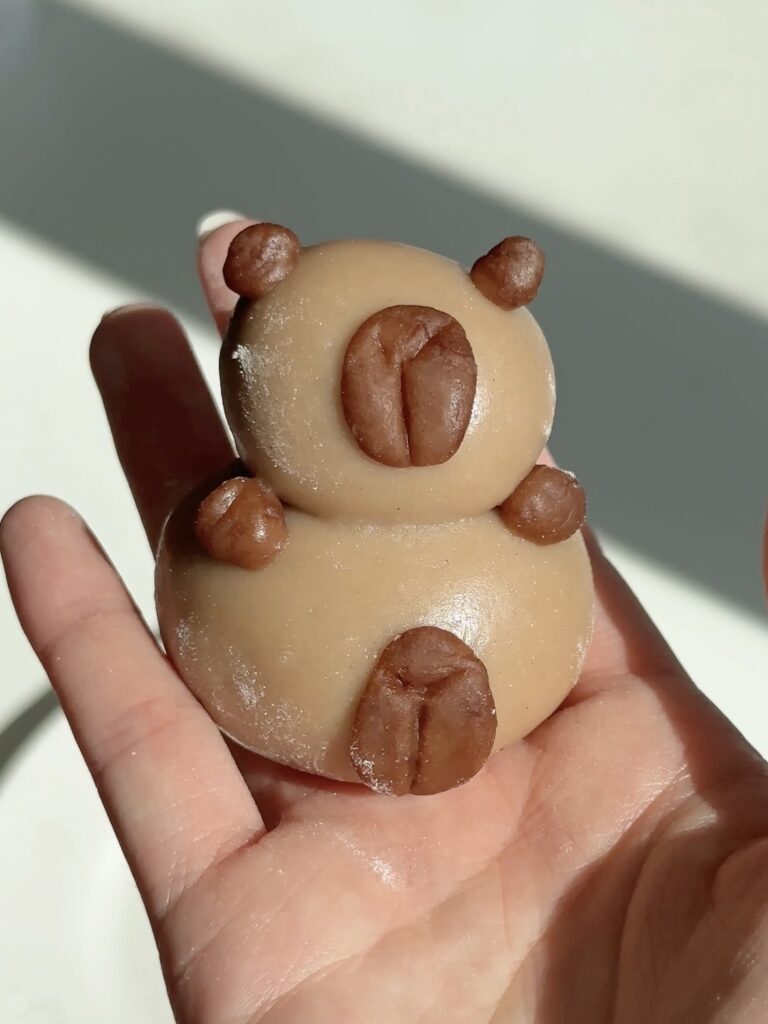
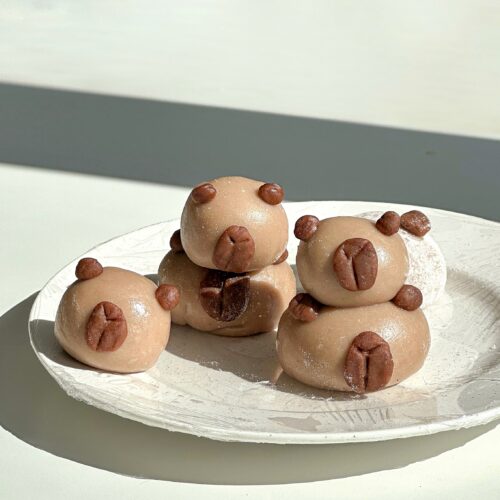
- Shape the dough for the capybara body into a slightly oval form. For the ears, roll two small balls, and for the mouth, flatten a small piece of dough into an oval shape. Draw a Y on the oval disk to represent the mouth. Attach the ears and mouth to the body as needed.
- Place the snow skin mooncakes into an airtight container and freeze them overnight.
- Before serving, transfer the mooncakes to the fridge for 1 hour to achieve an optimal texture. Alternatively, leave them at room temperature for 10-20 minutes.
Video
We are a participant in the Amazon Services LLC Associates Program, an affiliate advertising program designed to provide a means for us to earn advertising fees by linking to Amazon.ca and affiliated websites.